
Getting a corkscrew nose ring in can be a bit tricky, but with the right technique, you can do it smoothly and comfortably. This guide will walk you through the essential steps to successfully insert your corkscrew nose ring without any hassle. By understanding the anatomy of the jewelry and following a systematic approach, you can ensure a safe and effective insertion process.
Understanding Corkscrew Nose Rings
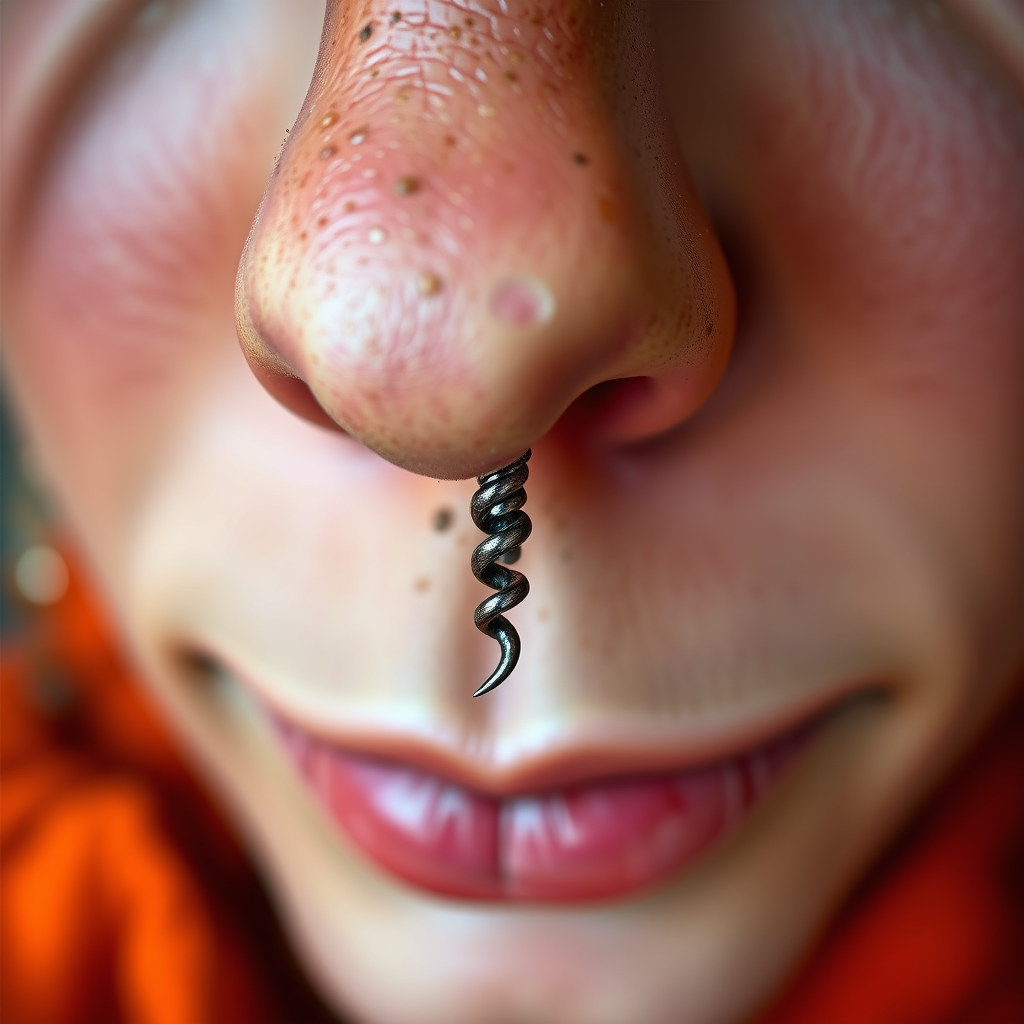
Corkscrew nose rings are unique in design, featuring a spiral shape that not only adds a stylish flair to your look but also helps keep the jewelry securely in place. This design is particularly beneficial for people who have active lifestyles or prefer a more secure fit. Typically, corkscrew nose rings are made from materials such as surgical steel, titanium, or gold, which are known for their hypoallergenic properties and durability. These materials are generally safe for most piercings, minimizing the risk of allergic reactions or infections. Understanding the construction and benefits of corkscrew nose rings can help you make informed decisions about your jewelry choices.
Preparing for Insertion

Before you attempt to insert your corkscrew nose ring, proper preparation is essential to ensure a smooth and hygienic process. Start by thoroughly cleaning your hands with soap and water, and then dry them with a clean towel. Next, clean the nose ring itself with a saline solution or rubbing alcohol to eliminate any potential bacteria that could cause infection.
It’s also advisable to prepare your nostril for the insertion. Apply a small amount of water-based lubricant or a saline solution to the nostril to help ease the insertion process. This step is particularly important if you’ve recently had your nose pierced or if it’s a bit dry, as moisture can help the corkscrew glide more effortlessly through the piercing.
Inserting the Corkscrew Nose Ring
With your nose ring cleaned and your nostril prepared, it’s time to insert the jewelry. Start by gently holding the tip of the corkscrew with your fingers. Position the tip at the entrance of your nostril, ensuring that you have a good line of sight and are comfortable with your hand positioning.
Using a slight twisting motion, gently guide the corkscrew through the piercing. It’s important to follow the natural curve of your nostril as you insert the ring. If you feel any resistance, pause and reassess your angle; forcing the ring can lead to irritation or injury. Instead, gently wiggle the ring until you find the optimal angle that allows for smoother passage through the piercing.
Adjusting the Corkscrew Nose Ring
Once the tip of the corkscrew is through your nostril, carefully pull the ring further until the spiral is snug against your nostril. At this stage, you want to ensure that the ring is secure but not overly tight; it should allow for slight movement without causing discomfort.
Check to see if the corkscrew sits flush against your skin, as this will help prevent the jewelry from snagging on clothing or other items. If it feels too tight or uncomfortable, you may need to readjust it. Gently push or pull the ring to find a comfortable position, ensuring that it maintains its spiral shape while fitting securely.
Troubleshooting Common Issues
It’s not uncommon to encounter minor issues during the insertion of a corkscrew nose ring. If you experience resistance while inserting the ring, gently wiggle it back and forth to find the best angle that allows for smoother passage. If the corkscrew isn’t sitting properly or feels uncomfortable, it may be necessary to remove it and try again or consider a different size.
Sometimes, the piercing may be swollen or irritated, particularly if it’s new. In this case, you may want to wait a few days before attempting to insert the corkscrew again. If you continue to have difficulties, it could be beneficial to consult with a professional piercer who can provide expert assistance.
Aftercare Tips
After successfully inserting your corkscrew nose ring, proper aftercare is crucial to promote healing and prevent infection. Clean the area around the piercing daily with a saline solution. This helps to remove any bacteria or debris that may accumulate and is essential in fostering a healthy healing environment.
Additionally, avoid touching or twisting the nose ring excessively, as this can irritate the piercing and delay the healing process. If you find yourself needing to adjust the ring, wash your hands thoroughly before doing so. Remember, patience is key; most nose piercings take several weeks to heal completely, and adhering to a consistent aftercare routine will support this.
When to Seek Professional Help
While many people can successfully insert and care for their corkscrew nose rings at home, there are times when professional assistance may be necessary. If you experience excessive pain, persistent bleeding, or signs of infection—such as increased redness, warmth, or discharge—it’s important to consult a professional piercer or healthcare provider immediately.
Additionally, if you’re uncertain about the insertion process or feel uncomfortable attempting it yourself, don’t hesitate to visit a licensed piercer. They can provide guidance, answer any questions you may have, and ensure that your piercing is in optimal condition.
Inserting a corkscrew nose ring may seem daunting at first, but with these steps, you can confidently do it yourself. Prioritizing cleanliness and comfort is essential as you navigate this process. Should you encounter any difficulties or have concerns regarding your piercing, do not hesitate to reach out to a professional for assistance. Remember, taking the time to properly care for and insert your jewelry will enhance your overall experience and satisfaction with your nose piercing.
Frequently Asked Questions
How do I properly insert a corkscrew nose ring?
To insert a corkscrew nose ring, begin by ensuring your hands are clean to avoid any infections. Hold the ring by the straight end and gently insert the corkscrew end into your nostril, angling it slightly to follow the natural curve of your nose. Once the tip is through, rotate the ring slightly to help guide it in until the corkscrew shape sits comfortably inside your nostril.
What should I do if my corkscrew nose ring is stuck?
If your corkscrew nose ring feels stuck, do not force it as this can cause injury. Instead, try to gently twist and wiggle the ring to loosen it. If you are unable to remove it after a few attempts, it’s advisable to seek assistance from a professional piercer who can safely remove the jewelry without causing harm.
Why is my corkscrew nose ring causing irritation?
Corkscrew nose rings can cause irritation if they are made from low-quality metals, if they are not the right size, or if they are inserted improperly. Ensure your jewelry is made from hypoallergenic materials such as surgical stainless steel or titanium, and check that the corkscrew shape is not too tight or long for your nostril. If irritation persists, consider consulting a professional piercer or dermatologist for advice.
What is the best type of corkscrew nose ring for new piercings?
For new piercings, the best type of corkscrew nose ring is one made from implant-grade materials like titanium or surgical stainless steel, as these are less likely to cause allergic reactions. Additionally, a shorter corkscrew or a ring with a smaller gauge can reduce the risk of irritation and provide a more comfortable fit while healing.
Which size corkscrew nose ring should I choose for my piercing?
The size of your corkscrew nose ring typically depends on the gauge of the piercing and the anatomy of your nostril. Most standard nose piercings are done with a 20 gauge or 18 gauge needle, so choosing a corkscrew nose ring that matches this gauge is recommended. Additionally, consider the length of the corkscrew; a shorter length may be more comfortable for daily wear, especially if your piercing is still healing.
References
- Body piercing
- https://www.ncbi.nlm.nih.gov/pmc/articles/PMC3302085/
- https://www.verywellhealth.com/piercing-care-5112542
- https://www.healthline.com/health/body-piercing-guide
- Error | AAP